Posted on

Springtime in Stitches

Short and sweet today.  I just finished a small, dual-purpose project:
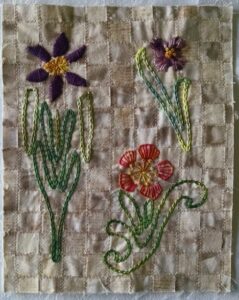
This is a future class sample, and a teaser for some embroidery patterns that I hope to have available soon.  The base of the above piece is an example of fabric weaving from Fabric Embellishing: The Basics and Beyond by Ruth Chandler, Liz Kettle, Heather Thomas and Lauren Vleck (Landauer, 2009).  I’d love to teach a monthly workshop on fabric embellishing, there are so many surprising techniques to have in our art quilt skill sets.  I really enjoy learning and sharing new things with others.

From my “finding inspiration anywhere” files, here is a random snapshot I took last week of spring beauties and a few violets that I found on a walk around the countryside:
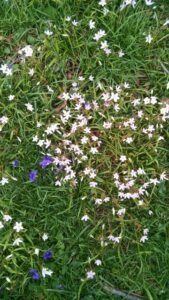
There is a little composition lesson here, this is an example of crystallographic balance, where there is no main focal point.  Look at it from a short distance, and there are still areas of negative space, where there are gaps in the flowers.  Visual interest comes from those gaps and in the contrast between the short star-like petals of the spring beauties against the long blades of grass sprawling in every direction.  Of course, the pop of color from the violets adds an element of surprise.  Yes, I am imagining how to turn this into a little stitched piece… someday.
 

Posted on

Wavy Lines

This is strictly technical stuff today, not the most exciting, but since this blog is a bit of journal of my creative pursuits, this is what has been on my mind the past few days.  Working with vintage textiles presents some interesting challenges, and I certainly don’t want to discourage anyone from creating with them.  Just be prepared!

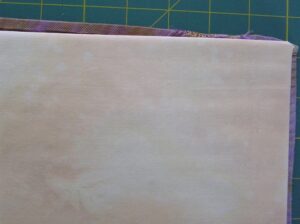
My next step for my latest collage was to cut the batting and backing to size, wrap the extra 2” of backing inside the batting, put all three layers together, then quilt.  I keep going back to this idea of mine to not have a visible border or binding to my collages.  Right away, there was a problem.  My dyed damask napkin that is the base of the collage is not square.  Take a look at this wavy edge:


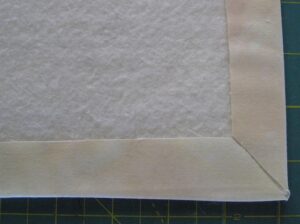
A bit discouraging, but I am stubborn.  I am going to make this work.  Yes, I had to re-trim my initial cut of batting… twice, despite careful measuring.  I had to trim (and trim again) so that none of the batting/backing was showing from the front.  Finally, I achieved that little goal, and wrapped the backing fabric around the batting, and ironed it into place:

So, this ended up being a fussy process, and it will be acceptable for a small project like this, but I cannot see it working at all for the larger whole tablecloth that I have in the works.  Back to the drawing board…  Meanwhile, my concern right now is quilting my trial piece.

Later in the week, I promise something much more interesting to look at!

Posted on

Next Step in an Experiment

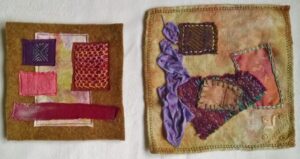
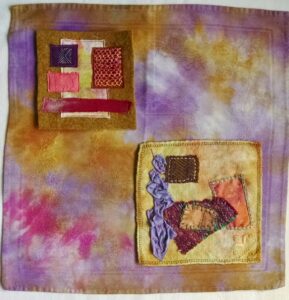
Thursday already?  Time sure flies while slow stitching, strange how that works.  I have made two quick mini collages to go on the damask napkin that is my latest experiment in using these vintage textiles.  Here they are:

The collage on the left was stitched by machine with some hand embroidered details.  The one on the right was entirely hand stitched.  I think that it is time for me to measure and cut the batting and backing for the napkin base.  I am going to cut the backing fabric a generous two inches larger than the finished size.  My plan is to fold over the extra backing fabric to the inside of the quilt sandwich, then quilt to secure all of it.

There won’t be much room for error, and I am a bit nervous, since I want to use this technique on a much larger piece.  At this point, I need to just go ahead and try it and quit rethinking the process.  Find out if I succeed on Tuesday.  I need to come up with a catchy title for this piece too…


Posted on

Stitching to Music

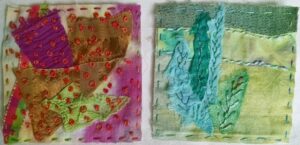
I will get to the trial piece that I talked about last post – later this week, I promise.  Today, I want to share a couple of  4″ squares that I made while listening to opera.  The Metropolitan Opera is streaming a different opera performance daily during this coronavirus shut down.

The square on the left was made while listening on the radio to the Saturday afternoon broadcast of Puccini’s  Tosca.  The square on the right was created while I watched Dvorak’s Rusalka last night.  My process was to first listen and/or watch for about 15-20 minutes.  Then, I started picking out my fabrics from my scrap stash.  I kept on listening while arranging and rearranging the fabric bits that I selected.  After I had the pieces placed, I listened for another bit of time while deciding how to stitch the square, then commenced the stitching.  Of course, last night I stopped work frequently to watch the action on my computer screen, and made mental notes from some of the stunning costumes.  I finished the squares by the final curtain, but I was certainly not trimming or stitching during the entire opera performance.  Even when I am not trying to multi-task, I spend a fair amount of time on my art quilts in a thinking mode before I take action on them.

Now, I would never expect anyone to correctly guess the piece of music that was playing while I made one of my collages, but I enjoy linking the music that inspired me to the visual art as a part of its story.  It would be fun to get a few other artists together to create their own individual responses to the same piece of music.  Check back on Thursday for my progress on last week’s experiment.

Posted on

Working Through Challenges

Using vintage linens and working in a collage style presents some challenging problems.  Certain traditional quilt methods of assembly just don’t work well with my creative visions and materials of choice.  If you’ve visited my booth at a quilt show, you’ll know that I sell quite a few dyed vintage damask table linens.  Many of them have a nice finished edge that I want to preserve while using them in a collage.  I am still trying to come up with an easy way to bind all the layers and not lose that finished edge.  Today, I am embarking on my latest attempt at this quest.

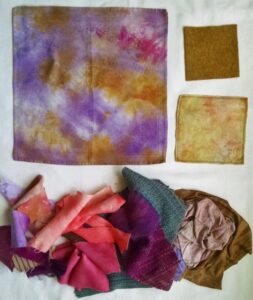
Starting with a medium size dyed damask napkin that will be the base of the collage, I picked out a couple of smaller squares on which to stitch scrap compositions.  These smaller squares will be similar to the 4 x 4” square that I have been featuring in previous posts.  The next step was to select scraps to add to the little squares:

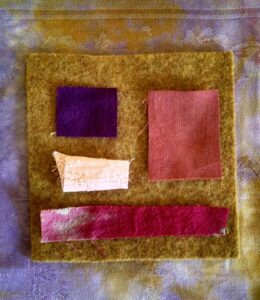
I pulled out more scraps than I’ll be able to use in this project, but that’s OK – it is good to have more to choose from during the early planning stages.  Next, I started working with the wool square.  Several little scraps jumped out at me, and the placement of them came together quickly.

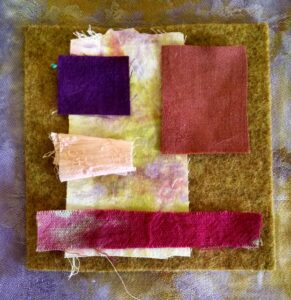
Notice that all the pieces are separate from each other.  How would they look with a piece of fabric underneath (other than the background) that connected them together?

I like the second version, the additional piece of fabric adds another layer of interest.  I’m going to take a look at some trims and funky yarns to add, as I think I’m ready to start stitching this one over the next couple of days.

I invite you to follow along in my quest over the next week or so, will this work out, or be a dead end?  This will also be another look into my creative process.